Showing posts with label headpins. Show all posts

Tuesday, January 21, 2014

I've Got Headpins!!

My latest headpins in my Etsy store.
If you would like a closer look at them, click
and you'll see all of my headpins.
I'm adding more.
I guess I didn't realize how low I was.  
See you tomorrow.

Monday, April 29, 2013

My Friend Monique Made These!

Monique sent me some pictures of what she made with the
rosebud headpins I made, and that she bought.
Didn't she do a great job!!!!

I love her design with these yellow headpins!!

Look at these red rosebud headpins!
Monique made them into beautiful jewelry!!

She's an amazing designer!!

Thank you, Monique, for showing me your work!!!
I
Love
It!!!!

Wednesday, February 27, 2013

On DragonFlies

I once read that dragonflies live only 24 hours.  I have since found that this is not true.  Many dragonflies live years, mostly as larvae, but they live longer than is anticipated.  Most live about six months.  Here's an interesting article about the life of a dragonfly.  Click HERE to read it. 

My dragonflies get caught in the beads.  You can see Hank HERE.  Since it's still cold here in the Midwest, I can only dream of the live ones I hope to see very soon. 

Estella is another dragonfly.   She full of sparkly dichro glass.  She's also captured in glass.  You can see Estella HERE.  I guarantee you, she will live much longer than six months.  She's a lovely little lady.  Unless you live in a warm climate, you won't see her for a while yet!


I hope to list more later, but for now.  I hope you enjoy these dragonflies!


Tuesday, September 27, 2011

Headpins and A Couple of New Things

I've started to make headpins again, but before I show them to you, because they aren't all listed yet, but they will be, I assure you, I want to show you a couple of fun new things!
Whew!  Now, I can breathe!
How about some chunky, faceted discs?
These would look great in a necklace, I think, but don't let my thoughts stop you!
The sky is the limit!
On my monitor, the outer layer of these discs looks pink, but it is not.  The color I used was dark ivory!
You can see a better photo of them here.
There you can see the edge is ivory and not pink!
Do you know what these are?  I'll tell you!  They are removable stitch markers for either knitting or crochet.
You will find them in my Etsy store very, very soon!
They would make a great stocking stuffer or a small gift for a fiber enthusiast!
Now, on to the headpins!  I will get them listed very soon!

I love these headpins!  I made them using dark annealed steel wire.  They remind me of Wild Berries and you can find them HERE!
I'll show you what I am going to list later this week!
Are you ready?

I don't know why, but I call these Chippers!  

Now here's a bit of orange!  I really like these.  The orange is not overwhelming!  It's just great!

Well, thanks for looking!  I hope to post more later!


Wednesday, August 17, 2011

New Beads and Stuff in my Etsy Store

I've been adding glass items to my store again!
Yahoo!
I'm torching.
Take a look!
I can't believe these didn't sell.  I had to renew them!
They are beautiful!
Hungry?
How about these popcorn beads?
Grab them while you can!  No calories!
Like Organic?  This focal is only $10.
It's located in this section:  10 dollar sets/focals
This is a section for lampworkers.
It's called:  Murrini/Shards/ Frit,
or something like that!
This silvered ivory murrini is in that section.
I hope to be adding more shards and murrini soon.
That's the section you can check!
These are called 
Not real creative, but it works!
So, stop by for a visit!
I'd love to see you.
If you are a returning customer use the coupon code
IMBACK
for a 10% discount on your order.

Saturday, March 26, 2011

From Boobies to Roses - so it's been fun!


It's just been one of those weeks. I've made everything from boobies to roses!
Take a peek at my Etsy store,
and
you'll find them there.
Or,
with any luck,
you won't!

Have a wonderful weekend.
Enjoy everything you see,
from
boobies to roses!

Saturday, March 5, 2011

Finally! New to My Etsy Store, and There's Spring in the Air!

At last,
I've finally got my stuff together,
and
I've added some new items to my Etsy store.
Take a peek!
I love this key! It's so pretty. I used a silver enriched glass for the bead, and, yes, the bead slides up and down the key!

I call them Bumpsters! I love these little, dotted beads. They remind me of early spring!

These rich, jewel toned Bumpsters remind me of spring that is ready to ripen into summer!

These head pins/bead pins/ pod pins are my absolute favorite!
I can see these pod pins making some gorgeous wearings or as danglies in a necklace or bracelet!

These head pins/bead pins/pod pins are ready for summer! Remember summer? I know it's been a long winter, but what a magnificent way to brighten up your day!

Last, but not least, is Tweet! He's the first bird of spring! Oh, and that isn't bird poop coming out of his butt. It's just the string I used to tie this mini set together. Wouldn't this make a great, funky pendant for spring?

Well, that's all for now. I just need color! These beads have helped me!
Enjoy!

Sunday, November 7, 2010

So, You've Got the Headpins, Now, what do you do? Part 2.


Again,
You have the headpins,
What do you do?
How about some
wire woven
Pendants
this time?
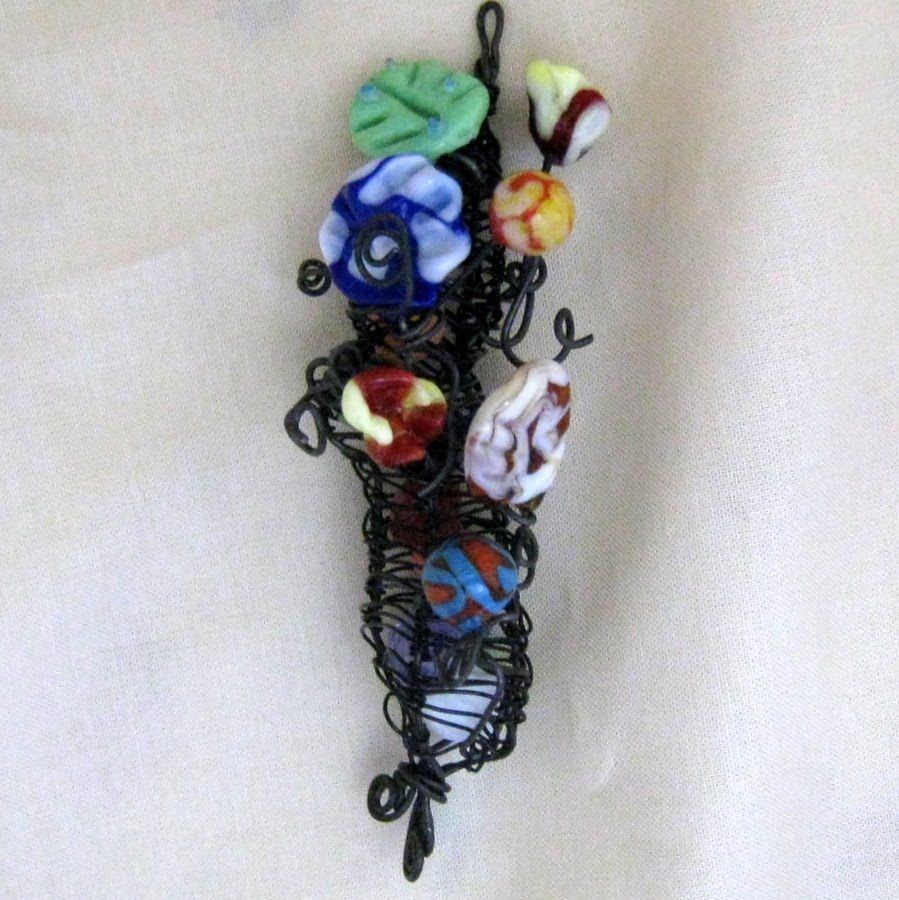
The headpins are at the top.
The focal is midway.
This one hangs about 3 inches.

I used my "bead pins" to make this pendant.
After the wire work was finished,
I added some of my
smaller
handmade
lampwork
beads.

This one is my favorite.
The pendant lays flat.
With the exception of the small focal bead,
the rest of the beads
are
headpins.

Which pendant do you like the best?

Wednesday, November 3, 2010

So, You've Got the Headpins, Now, what do you do?


I made these headpins using brass wire.
Here's an easy peasy tutorial on how to make some earrings.


Step 1:
Slip a crystal or other bead on the wire.
(I told you this was easy.)


Step 2:
About a 1/2 and inch away from the bead,
bend the wires using your fingers or a mandrel of your choice.
Here, I used a knitting needle.


Step 3:
Using a ruler,
measure about 1 inch down from the bent part of the wire.


Step 4:
Cut the wires using your wire cutters at about the 1 inch mark.


Step 5:
Using a file (I used an emery board,) file the ends of the wire so that there are no sharp edges.


Step 6:
Gently work harden the wire. I used my chasing hammer and bench block.
I hammered the top edge of the earring flat.


It only took about 10 minutes per set.
It's quick and easy to do.
Headpins work great!

Thursday, October 28, 2010

New In My Etsy Store


More about this later, but I'm venturing into the world of metals. I plan to keep lampworking, too, but I think I've found a new love! I am taking online classes (later blogs) that are helping me with this new love task.
You can find this pendant here.

I'm slowly but surely restocking my headpins. They were a big hit at the show last weekend.
I hope to add more soon.
These are called Poker Face. Don't ask why. They just are.

I'm embarrassed to admit this, but I cleaned out my closet today, and
I found this bag of unused recycled braided sari yarn, 100% silk. I bought it a while back with full intentions to use it, but now, I can't remember why!
So, I listed it in my Etsy store! I have way too much and plenty to share!


How about some new murrini? They are so relaxing for me to make! I almost go
zen with murrini. I guess that's why I have so much here.
You can find this, newly listed, in my Etsy store.


These floral headpins were so much fun to make! I love poking glass and moving it around. I used dark annealed wire to make these headpins! They'd look great on earrings or a pendant.

That's all for now. Stay tuned for more!