Like these bangles?
They are fun, quick, and easy peasy.
Here's how you make them.
If you want a leather base, these are the tools you'll need.
Even if you want a wire base, you'll still need these tools.
The type of wire you use doesn't matter.
You will need both 18 gauge and 24 gauge wire for a wire base.
For a more flexible base use leather.
The amount of leather that you will need depends on how big your palm is. I have wide palms. I didn't measure the amount of leather, but you want the leather to be able to slide over your palm without stretching it out of shape. You also want to take into account the dangle of your bangle on your wrist. If you want a tighter dangle, pull the leather closer, but if you want larger bangle, let it hang looser.
When you have found the right size, hold your bangle together with your clip or clothespin.
You will need to cut, approximately, 3 feet of 24 gauge wire. Work slowly and carefully, since this wire can knot.
Begin by wrapping your ribbon or fabric at one end of the leather overlap. Wrap anywhere from 5-8 times.
Again, the amount of ribbon that you use will depend on your wrist size.
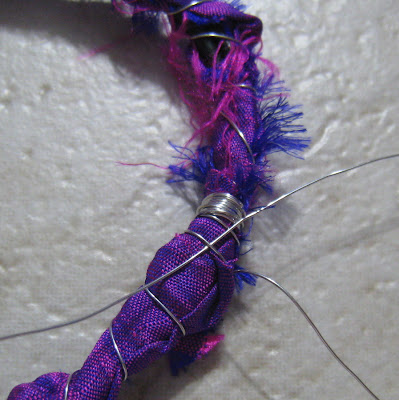
Fold your fabric as you begin to wrap it with wire.
I leave my clip on until I get right next to it. This helps to hold the leather in place.
Wrap your wire, while tucking your fabric, about every 1/4 inch or so. When you get close to the clip, remove it. By then, your wire will be holding your leather in place.
Wrap your wire around your bracelet until you are about within an inch of your starting point.
Trim your ribbon or fabric. Leave about a half an inch extra of your ribbon or fabric.
Fold the end of your fabric or ribbon underneath to that you do not have a raw edge to finish.
Wrap your ribbon until you meet your first join. Then begin to wrap your wire about 5-8 times to secure the fabric at the end.
You should still have wire left over. Tuck that wire through a wrap.
Pull the remaining wire through and tuck it into another wrap and return again, tucking as you go. This secures the wire so that your bangle will not come loose.
This is an important step to follow.
Trim the wire and discard any extra wire.
Ta-da! You're done!!
Easy Peasy!
Now, if you would like to use a wire base, you just need to follow the next three steps first, then proceed as you did with the leather base.
Again, the amount of 18 gauge wire you will need depends on the size of your palm.
Cut the wire so that there is some overlap.
Cut an extra 12" piece of 24 gauge wire.
Secure the ends of your base with the wire, wrapping it about 5-8 times,
then secure any loose wire by wrapping the remainder of your wire around it.
This step is optional, but I do like it. I work harden my wire using a rubber hammer and my bench block.
Now, you can begin to add your ribbon or fabric following the above directions.
Now, I used both ribbon and fabric.
The ribbon I used is silk cut from saris. I love this ribbon!
So,
now, you are finished!!
Enjoy your bangles!
I made 5 of these bangles!
They were fun and quick and easy!
Enjoy!


4 comments:
I LOVE fresh and easy summer jewelry! Those wouldn't even mind when they get wet or sandy. Fun tut! Thanks for sharing!
This is a great tutorial and can make such a variety of looks depending on the ribbon or fabric chosen. Bet some narrow lace over contrasting leather would be pretty.(Hey, Leather and Lace, great song LOL)
Great bangle tutorial!! Love that you used leather as a base - genius!
They're lovely!!! Thank you so much for the tutorial!!! Have a lovely day!!!
Post a Comment